Sunday 15 November 2015

HG Guncannon Revive, Better in Every Way?

The new HG model for the legendary RX-77 Guncannon has been re-released (design improved, for better articulation, more detail and so on) in the new "Revive" line of gundam plastic model kits. Now a little back story before I start. Guncannon was one of the first gundam models (does this guy count as a Gundam, or is he just a mobile suit?) I actually really liked. The design of quite bulky but not too much, all red except for the head and TWO CANNONS! Dang, I basically went "I'm gonna buy you when I get older... and I'm gonna put you together!!" The first version of this model I saw was the older SD model, sporting two Missile pods instead of the cannons. But I liked the design and whether it had the missile pods or the cannons, didn't really bother me. Man, thinking back, all the time I spent going to the toy store and asking for help from my brother to see the MG Guncannon box (they kept the MGs higher on the shelf), I really liked this model. So anyway, back to the topic at hand.


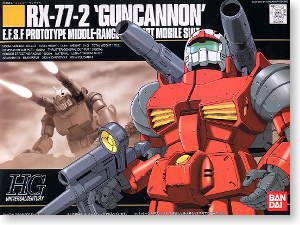
(Above-Right) I'm not sure whether many came out before this, but to me this was the original SD Guncannon which I had been wanting to buy.

(Above-Left) And that model was what I was tempted to buy before the new "Revive" series was announced. 

You might be thinking, "Hey, what about that MG you wanted so badly?" Way ahead of you buddy. I bought that during the Clear Part Campaign which I think was in 2010, so got that covered too. It's still shelved however, I'm hoping to improve my building quality before attempting that one.


(Above) The model in all its glory.

The colours/colour mixtures used :

All grey parts : Tamiya Enamel Dark Grey

All red parts : Tamiya Enamel Flat Red (9 Parts)
                       Tamiya Enamel Flat White (1 part)

All yellow parts : Tamiya Enamel Flat Yellow

All white parts : Tamiya Enamel Flat White (8 parts)
                           Tamiya Enamel Medium Grey (1 part)

The part behind the visor : Tamiya Enamel Aluminium


(Above) After a long time of not using Tamiya Enamel White paint, the quality and the way the paint adheres to the parts deteriorated significantly, and that's why in the mixture above I mixed a bit of medium grey. That paint is a life saver, it helped the paint "stick" and apply very smoothly to the part. Note I sanded everything before painting, but I might look into why I had this problem. Not too proud of my paint job this time, basically summed up in one word : Sloppy. I rushed to finish this initially and I had to pay the price. Broke some parts while cleaning up two sloppy paintjobs to the head, snapped off the antennas, I don't know maybe three times and cracking a polycap on the right arm, yeah... I might buy another HG Guncannon Revive.


(Above) Another problem I faced was running out of Matt/Flat Top Coat. If you build Gundam Models, unless you like the original plastic look (I don't mind the look for certain models) I highly recommend you top coat them. It gives your models a cleaner, smoother look, and for hand painted works like my own, smooths out brush strokes to give them a spray painted look. Basically, top coat make model look good, capiche? So, I ran out of top coat and I know certain smarty pants might say "Just buy more Farid, like seriously?" Well, I went to almost every store selling spray paint, auto stores, paint stores, departments stores, and none of them had it. Even the auto spray store I usually go to buy my spray paints (and they always had flat top coat) didn't have them. Oh and ordering online was not really a choice, I rushed to finish this remember? Well... initially...


However, I am extremely pleased with the model. The articulations all having more than 160 degrees of bending. The parts are very well separated. For example, the leg consists of the upper thigh ball joint, the thigh, the knee joint and the lower parts are all separated easily to allow gluing the part before putting them together, this was a big problem for me with older models as the knee joint (usually) had to be painted and put between two parts which are to be glued (for seam line removal) and then that part sanded and painted for a complete leg. All the thought put into how the model is assembled made this model so easy to paint and put together. The fact that this model only requires very minimal painting can also be a plus, only the machine guns on the head (originally white) and the parts right next to the arms joints needed to be painted yellow, oh and the inside of the visor, would make this model look pretty good as a straight build model.

That's pretty much it, and excellent model to build and paint! Now to save up and buy two more of these bad boys~


Farid

Monday 9 February 2015

Upgrading the Old Desktop PC!

Recently, I have been dreaming of building my own gaming rig (or in more appropriate terms, my own personal computer). So when my older bro asked me what would be a good upgrade for the desktop computer (which I think was bought in 2012) I was excited. My first time actually installing new components into a PC. Basically I thought, adding a graphics processor would give the computer the biggest boost in performance when gaming, and basically that was the idea, so that the main PC could run Starcraft II and Diablo III, with max settings on a 1360x760 monitor. It wasn't a particularly demanding game, it's no Crysis 3 or Tomb Raider, but it surprised me how much the graphics processor would cost.

Specs of the original PC are :
Intel Core i3-550 (dual core)
Intel HD Graphics
2 GB RAM
500 GB HDD (the product in the website has a 320 GB HDD)


and then... MAXIMUM PAWAAAAA! Basically what went on in my head.

Initially I thought the upgrade would be easy, throw in a graphics card, a little more RAM and hmmm, maybe even an SSD and the computer would blow me away with the sheer awesomeness of its power! So I went to the most reliable source anybody would pick, the internet, and found on Sapphire's website a performance chart. (View here) And since my bro and I didn't want to have to change parts which are already available, I decided to pick a graphics card which didn't require a 6-pin PCI-E connector, the R7 250.

I chose Sapphire cause it had the coolest looking shroud and fan.

However, life reminds you, well, let's be honest, in rather harsh ways that things don't go that smoothly. Basically the power supply included in the PC was a 250W power supply. And even for the R7 250, a minimum 400W power supply was recommended in order for the card to have sufficient power for it to perform smoothly.


Yup, right there.

So, a certain percent of the budget for all the parts had to be reduced to fit in a new power supply. Which then prompted a new thought, "Since we were going to pick a new power supply anyway, new power supply, PCI-E connector, graphics card which requires PCI-E connector, stronger card!" And there's where the R7 250X came in, a stronger card, which would also allow for more demanding games. After a lot more research, and also watching a video from LinusTechTips (This one), I found out that AMD cards are better optimized for Starcraft II, yielding about 60 frames per second even using the HD 7770 which was re-skinned as the R7 250X (based on this review). With all this taken into account, the R7 250X was the card to go for.

All that aside, the serious business, getting the stuff installed. For the R7 250X, it requires a minimum 500W power supply, I went with the Cooler Master Elite V2 550W power supply, a little bit more just for more head room, Kingston 2 GB 1333 MHz RAM and of course the R7 250X.

Installing it was pretty simple :


(Above) The R7 250X with 1 GB of GDDR5 VRAM, an AMD/ATI card from Sapphire.


(Above) 2 GB DDR3 1333 MHz Kingston RAM.


(Above) The 550W power supply which I had bought and installed much earlier.


Installing the graphics card in the case provided by eMachines, you will realize that the PCI-E slots are covered. The metal covers are supposed to be pried open with a pair of pliers before the card can be inserted. For me this was not fun to do, however aftermarket cases come with easily removable slot covers which are removed by unscrewing a small screw holding the slot cover in place. And basically after installing a card there's no going back. 


(Above) Everything installed, and although the graphics card does come with a reminder, if you're installing a graphics card, please connect the 6-pin PCI-E connector to avoid destroying your brand new graphics card.

With all of the new components installed, how do the games run you ask? Well an easy breakdown. Diablo III, which you can easily turn on a built in frame rate counter ran at a constant 43 FPS. Why 43? Well, I suspect the CPU to be a bottleneck, however, no matter how much action went on the screen the frame rate stayed at 43. Starcraft II also stayed at around 50-60 FPS, it did  fluctuate a lot especially as action started to get heavy on screen, however it should run smooth unless you have 4 players duking it out with maxed out armies.

I tested a few other equally demanding games like Counter-Strike Global Offensive and Dota 2. While I didn't have a frame rate counter on, if you have been playing on integrated graphics before this, the difference is too apparent and significantly better.


Farid