I'll jump right in and continue off where the last post stopped. I do apologize that this quite slow for a follow up, and also since I'm basically working on this model every day since I started, but uploading the pics took a while and now back to the topic at hand. What I had completed on the first day was the easiest of the tasks which unfortunately I had to face with these remaining preparations before painting. You might think painting is hard, oh no, NO NO NO, its not hard indeed, preparing the parts (these include sanding, molding and carving out parts if you plan on complete modification), and after a loooooong break of not building gundam models, this might not be the right thing to start again with, well, STRIKE 2, genius...
(Above) The above filling up of the empty space under this magazine, was the most smooth of my trials that follow~
(Above) The molding process, in the previous post, in case you are confused, I was making the mold, and in this I have applied it, and I have forgotten to mention that before using the mold you have to apply a layer of talcum powder, to prevent the mold from sticking to the applied epoxy putty. And there you have it, the molded outcome. However, there is much cleaning up to do before I can paint it.
(Above) What I had completed in the previous post, and now that the putty had completely hardened, its time to smooth down the putty to look seamless, well, almost seamless...
(Above) The tool shown works wonders! And I thank the bro who recommended it for smoothing down those pesky, PESKY seam-lines. However, it does take a while to get used to.
(Above) Before and After the smoothing process. It was quite a delicate procedure, and something completely new for me. But in the end, the results this tool can give you really are satisfactory!
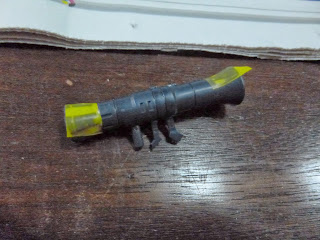
(Above) The 2 halves of the bazooka are cemented together, and then sanded to perfection, but in this pic, just waiting for it to dry.
(Above) All the filled up parts, also the rifle has been cleaned up a bit. However, after more hours passed, I found out that I had not put equal parts for the putty I used for the rifle, and as a result, the putty isn't as hard as I would like it, making sanding it a pain. Didn't really know what more to do with it, so I cleaned it up as best I could.
(Above) If you can make out the top left photo, the upper part of the fingers, the 2 middle ones don't have a clear line between them. Basing my technique on something I had read in Dengeki Hobby, I decided to try carve out the middle line. That was extremely hard, first reason being, you had to have steady hands. But these things are easily covered up by panel-lines.
Guess what, I tried it again...
(Above) Not sure if you can see it, but this was something I really wanted to try. I've always wondered how they make the lines so straight in the magazine.
Well, that's was pretty much second day, had to fill up more parts with putty, but I had finished them all off now. All that's left is the painting and more cleaning up. Now, if you'd excuse me, I have to play more Pokemon Y~
Farid


No comments:
Post a Comment