
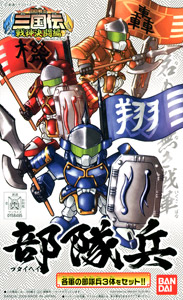
 (Above) Military Unit.
Now, first of all the basic tools for putting the model together are a nail file, cutters, a pen knife and sand paper the very fine ones. The reason for these items to be used are quite simple. The cutter for cutting, the nail file for cleaning the place where the parts are cut out. The pen knife is used also for cleaning cut marks that are hard to clean with the nail file. The sand paper is for making it really smooth and clean. The pen knife will be used more when you decide to paint your models but used only sometime when you just want to put the model together.


(Above) A part cut from the runner. And the part before and after it is cleaned.
This is the head, body and legs of the Military Unit. This model has only 4 movable points, the arms and feet. Now to clean up the cut mark with a pen knife, you can either scrape it off of cut away the cut mark. I think it is quite hard to see the difference but there is.
That would be all if you were to just put the model together. It would take less that half an hour to finish all the models. But, I guess I'll show a few steps for painting the model. First of all, decide the colours. Look at the side of the box and check out the colours to be painted. You can practice painting on SD or FG models because most of the parts require painting. All the colours will be painted on with brush and marker, instead of spray paint.
Before painting the model there are a few things that you should have prepared. First of all, a good and well-lit work space for you to spend your long hours of gundam making fun!! Second, prepare the stuff needed to clean the brushes if you are using any. Third, make sure you have all the colours for the parts you want to paint and also in advance plan the colours for the part you want to paint in you plan on making a few changes to the colours. With all those done, right before painting, make sure you rub the parts you want to paint with sand paper to give the paint a better grip on the plastic. This also makes it easier for you paint on light colours. And also make sure the parts are clean from dust, wipe the parts with a cloth and try not to touch the parts meant to be painted too much because the oil from your skin might make the painting job bad.

First of all, you should paint on the silver, for this I used Crome Silver. To paint it nicely, take a little bit of paint not too much and paint on, then slowly brush it. The reason for the little paint is that it will look more shiny rather then putting a lot of paint which will be darker I suppose. Then, you paint on the metallic green for the visor. I used a marker for this one. If there are certain spots where it is hard to paint with the marker, put some of the metallic paint from the marker somewhere so that you can take the paint with your brush and paint it. It almost impossible to not make mistakes so if you make some don't give up. You can still clean it up. As shown above I have painted the helmet silver, very shiny, the visor. You can see a little over painting at the corner of the visor.


(Above) Crome Silver paint. Enamel paint.

 After you finish painting, clean the brush with turpentine if you are using enamel paint. Then, you paint on the gold. You can paint with the gold marker for an easier job plus, the gold marker gives a nice shiny finish if the painting is done properly. However, just for the fun of it, I used titanium gold enamel paint. Meaning I have to use a brush. As you can see, the front body and back body have already been painted, and clearly, a lot of sloppy mistakes. The difference between titanium gold and gold from the marker is that it is lighter compared to the darker gold paint from the marker.
Well, that's all. I'll post another post to continue from this. The next one will include the cleaning process and about painting on the colour white.
Farid
No comments:
Post a Comment